The endeavor of preserving homegrown herbs extends the utility of a garden’s output. Effective drying and storage methods are crucial for retaining herbal potency, flavor, and aromatic qualities. This article outlines established techniques for these processes, offering practical guidance for home cultivators.
Understanding Herb Composition and Preservation Principles
Herbs, as living organisms, undergo chemical changes upon harvesting. These changes can degrade desirable compounds if not managed properly. Preservation aims to halt or significantly slow these processes, primarily through the removal of moisture. Moisture serves as a medium for enzymatic activity and microbial growth, both detrimental to long-term storage.
The Role of Moisture Content
Water constitutes a significant portion of a fresh herb’s mass. Reducing this to below 10-15% effectively inhibits most spoilage mechanisms. This is akin to removing the fuel from a fire; without sufficient moisture, mold, bacteria, and yeast cannot thrive. Different drying methods achieve this moisture reduction through various means, each with its own advantages and disadvantages.
Factors Affecting Herb Quality
Several elements influence the quality of an herb during and after preservation:
- Initial Herb Quality: Healthy, pest-free herbs harvested at their peak possess the best starting point for preservation. If you’re not yet growing herbs indoors year-round, you may be limiting your harvest window unnecessarily. Stress, disease, or improper harvesting can compromise this.
- Harvesting Time: The concentration of essential oils and other valuable compounds can vary throughout the day and the plant’s life cycle. Often, late morning after dew has dried is recommended.
- Drying Speed: Rapid, but not overly aggressive, drying helps to lock in volatile compounds. Slow drying can lead to oxidation and microbial development, diminishing aroma and flavor.
- Storage Conditions: Post-drying, light, heat, and oxygen continue to be significant degraders. Proper storage mitigates these effects.
Preparing Herbs for Drying
Before any drying method can be applied, proper preparation is essential. This initial stage sets the foundation for successful preservation. Neglecting these steps can lead to compromised quality.
Cleaning and Inspection
Upon harvesting, herbs should be cleaned gently. Shaking them to remove loose soil or insects is often sufficient. Washing is generally discouraged as it reintroduces moisture, prolonging the drying process and potentially encouraging mold. If washing is necessary (e.g., heavily soiled roots), ensure the herbs are thoroughly dried with a clean cloth or paper towels before proceeding to the next step. Inspect each herb thoroughly, discarding any damaged, diseased, or insect-ridden portions. This prevents contamination and ensures only high-quality material is preserved. Building a backyard compost bin takes less than an afternoon, and it’s the ideal destination for all that spent material.
Bunching and Singular Preparation
For herbs with sturdy stems like rosemary, thyme, or oregano, gathering them into small bunches is practical. Secure these bunches with twine or a rubber band, leaving enough space for air circulation between individual stems. Delicate herbs with smaller leaves, such as dill or parsley, are often best dried laid out individually or in thin layers to avoid compaction and promote even drying. Removing larger, tougher stems from leafy herbs can also improve drying efficiency and quality.
Leaf Stripping (Optional)
For herbs where only the leaves are desired, or for very thick-stemmed varieties, stripping leaves from stems before drying can be beneficial. This reduces drying time for the leaves and prevents the stem from retaining moisture and hindering uniform drying. However, for some herbs, leaving leaves on the stem can simplify handling during the drying process. Consider the herb type and the desired final product.
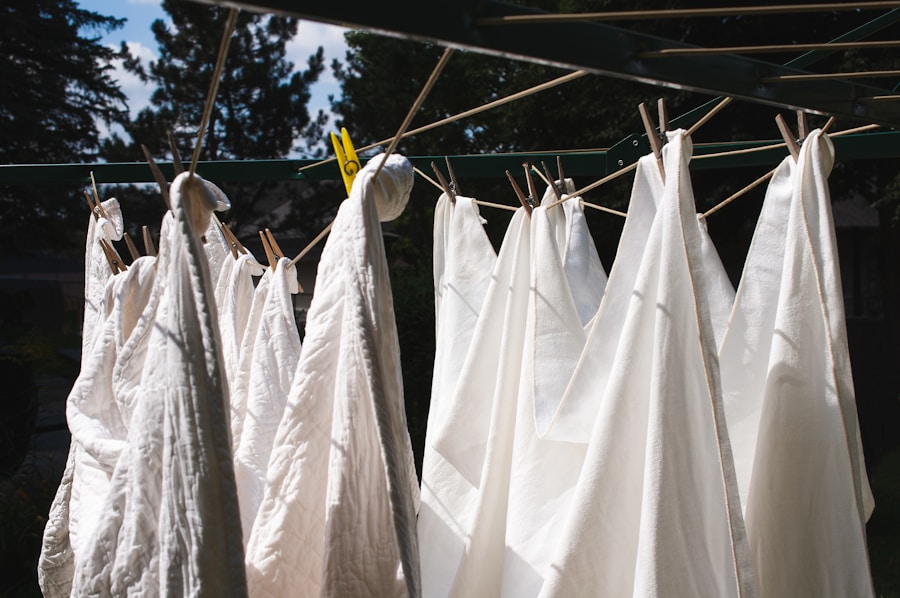
Air Drying Methods
Air drying is a time-honored and cost-effective method. It relies on ambient air circulation to remove moisture. This approach is best suited for herbs with lower moisture content and substantial stems.
Hanging Bundles
This classic method involves tying small bunches of herbs together and suspending them upside down. The ideal location is a dark, well-ventilated space with low humidity and a consistent temperature. An attic, a spare closet, or a pantry can serve this purpose. Directly addressing you, the reader, understand that light degrades essential oils, so a dark environment is paramount. Good air circulation is equally vital; stagnant air is an invitation for mold. Suspending herbs prevents moisture from accumulating in denser parts of the plant and aids even drying.
Drying Screens and Racks
For more delicate herbs or those lacking robust stems, drying screens provide an alternative. These can be commercially purchased or homemade using window screens stretched over a wooden frame. Lay herbs in a single layer on the screen, ensuring no overlapping for optimal airflow. Screens are also suitable for drying flowers or roots. Place these screens in a location with good air circulation, away from direct sunlight. Turning the herbs periodically, perhaps daily, promotes uniform drying and prevents moisture pockets.
Paper Bag Method
This technique offers a simple way to dry herbs while protecting them from dust and light. Place small bunches of herbs into paper bags, puncturing the bags with several holes to facilitate airflow. Suspend the bags in an appropriate drying area. The paper bag acts as a barrier against dust and can help prevent leaves from scattering as they dry. This method is particularly useful for herbs that tend to shed leaves easily.
Accelerated Drying Methods
While air drying is effective, certain circumstances or herb types benefit from more rapid moisture removal. Accelerated methods leverage heat or airflow to speed up the process.
Dehydrators
Food dehydrators are purpose-built appliances designed for drying. They circulate warm, dry air uniformly, making them highly efficient. Set the dehydrator to a low temperature, typically between 95°F and 115°F (35°C-46°C), to prevent the degradation of volatile oils. Higher temperatures can “cook” the herbs, diminishing their flavor and potency. Arrange herbs in a single layer on the dehydrator trays, ensuring adequate spacing for airflow. Dehydrators offer consistent results and are particularly useful for larger quantities of herbs or those with higher moisture content.
Oven Drying
Oven drying can be a viable option for small batches of herbs if a dehydrator is unavailable. However, it requires careful monitoring to prevent scorching. Set the oven to its lowest possible temperature, ideally below 180°F (82°C). Even then, the residual heat can be too high for delicate herbs. Some ovens have a “warm” setting which may be suitable. Prop the oven door slightly ajar to allow moisture to escape and prevent the oven from overheating. Arrange herbs on a baking sheet lined with parchment paper in a single layer. Turn them frequently. This method is generally less ideal due to the difficulty in maintaining low temperatures and the risk of degradation.
Microwave Drying (Limited Use)
Microwave drying is a rapid method, primarily suitable for small amounts of leafy herbs like sage or parsley. Place herbs between two paper towels on a microwave-safe plate. Microwave on high for 30-second intervals, checking for dryness after each interval. Overheating can quickly scorch herbs and destroy essential oils. The main drawback is the difficulty in controlling the heat and the potential for uneven drying, making it less suitable for preserving volatile compounds. Use this method with caution and only for immediate, small-scale needs.
Determining Dryness and Storing Dried Herbs
The drying process culminates in a product that should retain its desirable qualities for an extended period. Knowing when herbs are sufficiently dry and how to store them properly are the final, critical steps.
Assessing Dryness
A properly dried herb will exhibit specific characteristics. The leaves should feel brittle and crumbly to the touch, snapping rather than bending. If the stems are present, they should also snap cleanly. There should be no pliability or sponginess; these indicate residual moisture. Visually, the color should be largely retained, though often slightly darkened compared to fresh herbs. A faded or brown color suggests issues during the drying process, such as excessive heat or light exposure. Smell the dried herb; the aroma should be concentrated but not musty. Mustiness is a strong indicator of mold formation, rendering the herbs unfit for consumption.
Packaging for Longevity
Once herbs are definitively dry, they require immediate and appropriate packaging. The primary enemies of dried herbs are light, air, and moisture. Store herbs in airtight containers. Glass jars with tight-fitting lids are an excellent choice, as they are non-reactive and provide a good seal. Metal tins can also work, provided they create an airtight environment. Avoid plastic bags or containers for long-term storage, as they can be porous to air or off-gas undesirable compounds.
Consider the form of the herb before storage. For many herbs, storing them whole or in larger pieces and crushing them just before use helps preserve their volatile oils. This acts as a protective shell, much like a whole nut safeguards its kernel. However, for some culinary convenience, you might choose to crumble herbs after drying. If so, ensure they are absolutely dry to prevent clumping.
Ideal Storage Conditions
The storage environment is as critical as the container. Dried herbs should be kept in a cool, dark place. A pantry or a cupboard away from sources of heat (like ovens or direct sunlight) is ideal. Temperatures above 70°F (21°C) can accelerate the degradation of essential oils. Exposure to light, even indirect, will fade colors and diminish flavor. The metaphor here is a vampire; darkness preserves their essence. Finally, ensure the storage area is dry, as humidity can reintroduce moisture and promote spoilage even in sealed containers.
Common Problems and Troubleshooting
Even with careful execution, challenges can arise during herb preservation. Understanding common issues and their remedies is crucial for consistent success.
Mold and Mildew Formation
This is arguably the most common and serious issue. Mold and mildew typically appear as fuzzy patches or discoloration (often white, grey, or green). They thrive in high-moisture, low-airflow environments.
- Cause: Insufficient drying, poor air circulation during drying, harvesting damp herbs, or humid storage conditions.
- Troubleshooting:
- During Drying: Ensure herbs are spread thinly, not overcrowded. Increase airflow in the drying area with fans if necessary. If drying outside, bring herbs indoors if humidity rises.
- Before Storage: Double-check dryness. If you detect any sign of mold, discard the affected herbs. It is generally not safe to attempt to use molded herbs, as some molds produce toxins.
- In Storage: Store in airtight containers in a dry environment. If you find mold in a container, discard the contents and thoroughly clean and sterilize the container before reuse.
Loss of Flavor and Aroma
A diminished sensory profile indicates that essential oils and other volatile compounds have degraded.
- Cause: Excessive heat during drying, prolonged exposure to light, slow drying that allows oxidation, or poor storage conditions (e.g., non-airtight containers, warm temperatures).
- Troubleshooting:
- During Drying: Use low heat for accelerated methods. Air dry in a dark place. Ensure good airflow to speed up the process while remaining gentle.
- Storage: Store in airtight, dark containers (like amber glass) in a cool, dark pantry. Consider storing herbs whole or largely intact to protect internal compounds until use.
Fading Color
While some color change is normal, significant or rapid fading indicates degradation.
- Cause: Primarily exposure to light (ultraviolet radiation) and sometimes excessive heat.
- Troubleshooting:
- During Drying: Dry herbs in a dark environment.
- Storage: Always store dried herbs in a dark place, ideally in opaque containers or clear containers stored within a dark cupboard.
Pest Infestation
Occasionally, stored herbs can become host to pantry pests such as cabinet beetles or weevils.
- Cause: Primarily an issue with improperly cleaned herbs (eggs/larvae present) or non-airtight containers allowing pests entry from the pantry environment.
- Troubleshooting:
- Before Drying: Thoroughly inspect herbs for any signs of insects.
- After Drying: Ensure herbs are completely dry. Pests are drawn to moisture.
- Storage: Use truly airtight containers. Consider freezing newly dried herbs for a few days to kill any potential hidden insect eggs, though this is usually only necessary if a prior infestation has occurred. Regularly inspect stored herbs and pantry shelves for any signs of pests. Maintain good pantry hygiene.
Our complete guide to harvesting and storing fresh produce covers these principles for vegetables and fruits as well. By adhering to these principles and techniques, home cultivators can effectively preserve their homegrown herbs, extending the joy and utility of their garden’s bounty throughout the year. The initial effort in proper drying and storage translates to a readily available supply of flavorful and potent ingredients, a tangible reward for horticultural endeavor. We’ve put together 5 recipes using your fresh harvest that make excellent use of homegrown dried herbs.